Behind the walls!
Debbie and I continue to make progress on our home and we are excited to share our experience.
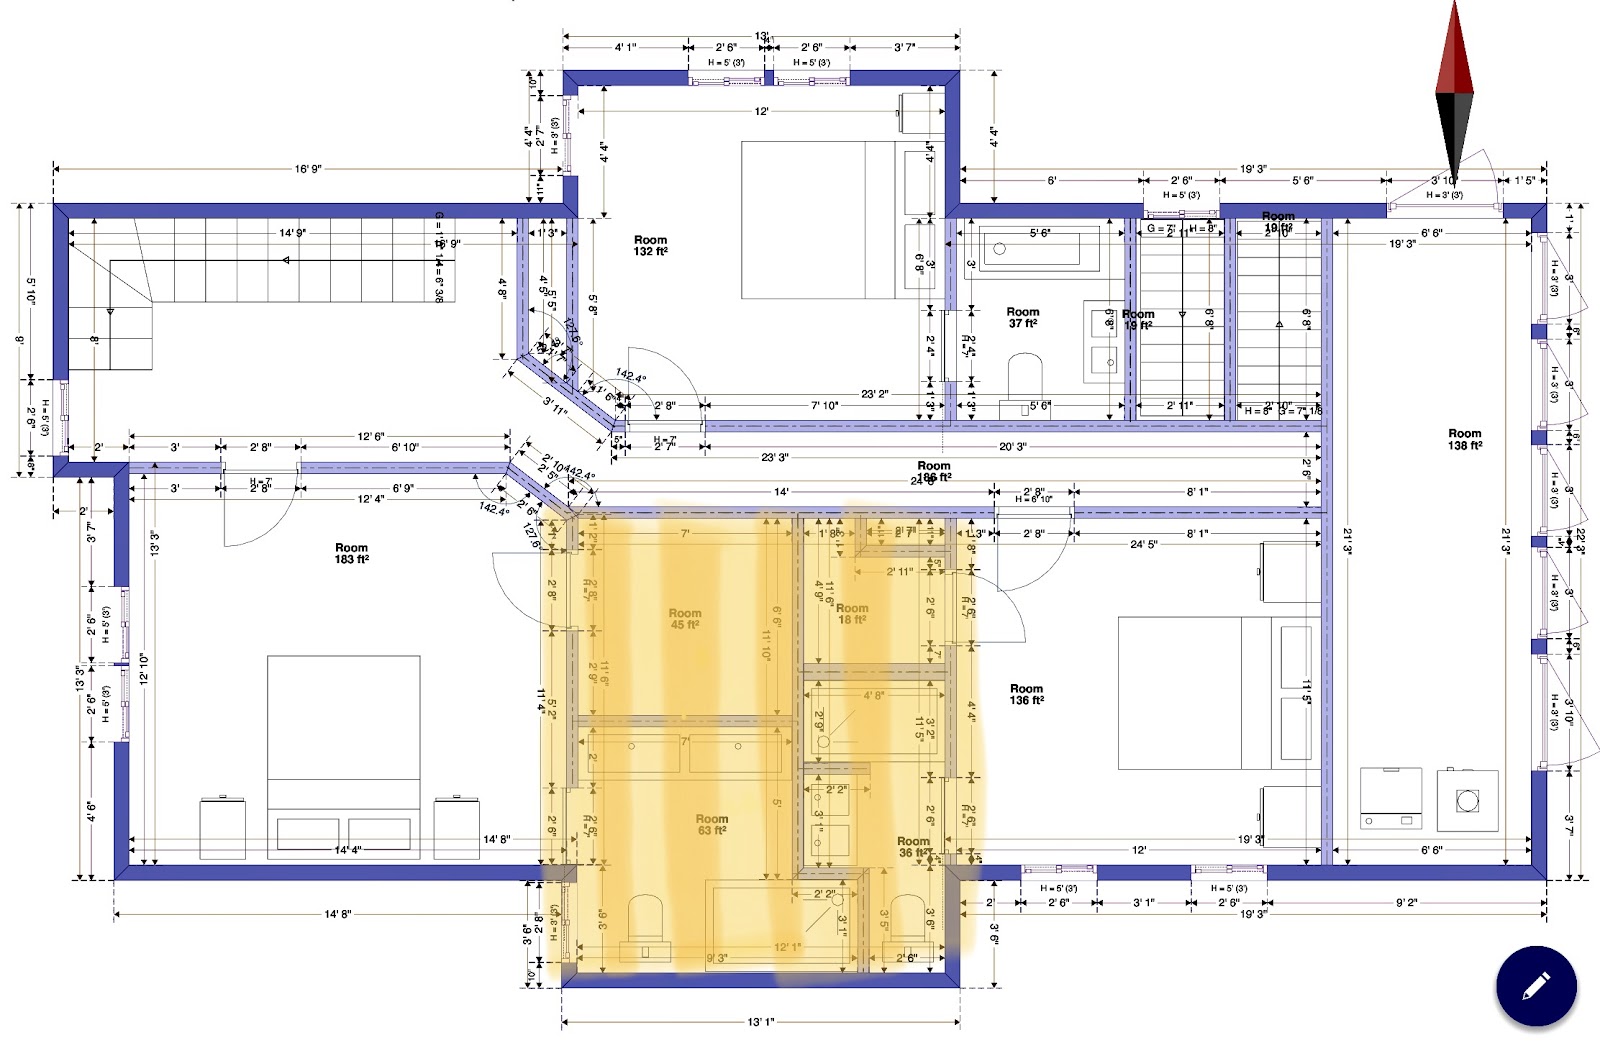
We bought this house knowing it had a good history and was in fairly good shape, but needed plenty of work. Our original plan was to do some minor renovations and remove one of the four upstairs bedrooms to use the space as bathrooms and closets for the adjacent bedrooms, therefore all 3 bedroom would have its own bath. Well, minor renovations is an understatement to the project at hand. One thing led to another and we now have a full scale renovation. Below is the second floor plan we developed and the highlighted area is where the original 4th bedroom will be transformed into two full baths and closets.
We bought this house knowing it had a good history and was in fairly good shape, but needed plenty of work. Our original plan was to do some minor renovations and remove one of the four upstairs bedrooms to use the space as bathrooms and closets for the adjacent bedrooms, therefore all 3 bedroom would have its own bath. Well, minor renovations is an understatement to the project at hand. One thing led to another and we now have a full scale renovation. Below is the second floor plan we developed and the highlighted area is where the original 4th bedroom will be transformed into two full baths and closets.
Heat was our main priority and we had no issues installing the new high efficiency Crown Phantom Boiler made here in Philadelphia. Our only issue was waiting for UGI (our local gas company) to make the tap from the street to our house. That day finally came on November 8th; not a day too soon as it was getting very cold.
The home had cast iron radiators that we wanted to utilize with the new boiler. We rebuilt each radiator by installing new bushings, valves, and fittings. The boiler is divided into three zones: first floor, second floor, and a separate zone for the radiant heat loops. All zones were connected to the manifold using hePex made for heating applications. Radiant heat will be installed in each of the bathrooms as well as the upstairs hallway. An indirect hot water heater was connected for our domestic hot water to take further advantage of the boilers efficiency. Every bedroom and bath will have its own thermostat for control and comfort. 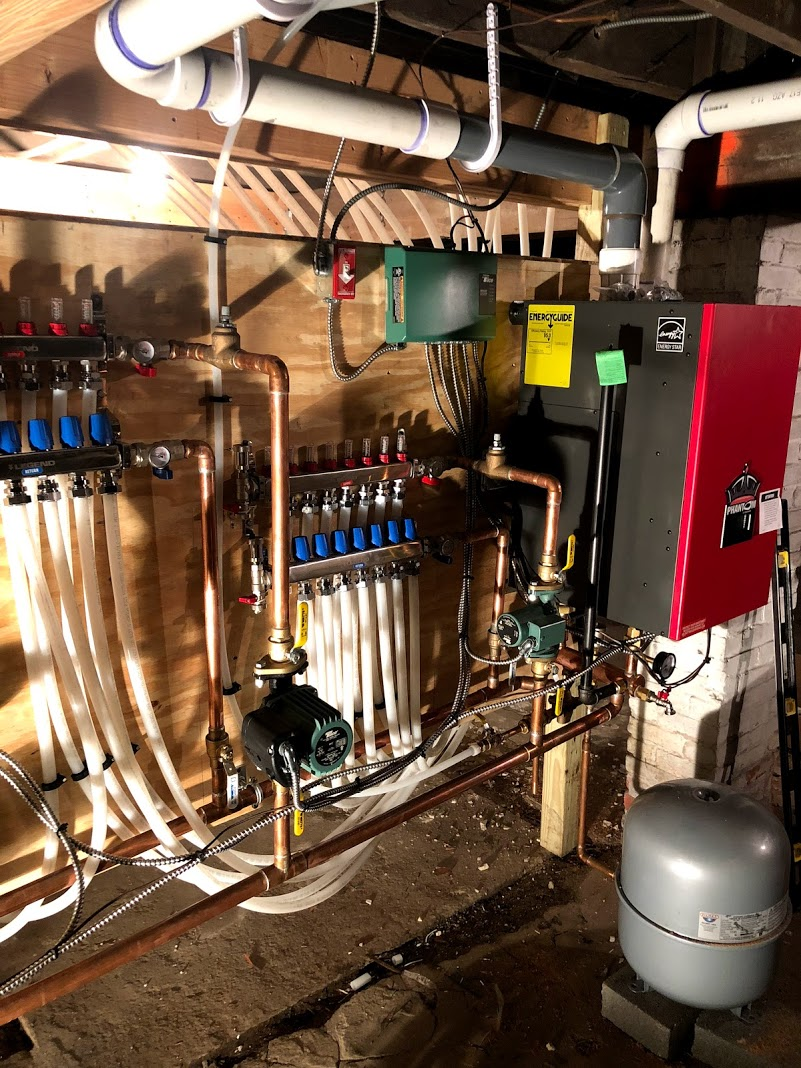

Crown Phantom high efficiency boiler with a 10-1 turndown, outdoor reset, Uponor stainless steel manifolds, ¾” hePex, Taco circulators, and a MS-40 mega store indirect domestic hot water heater.
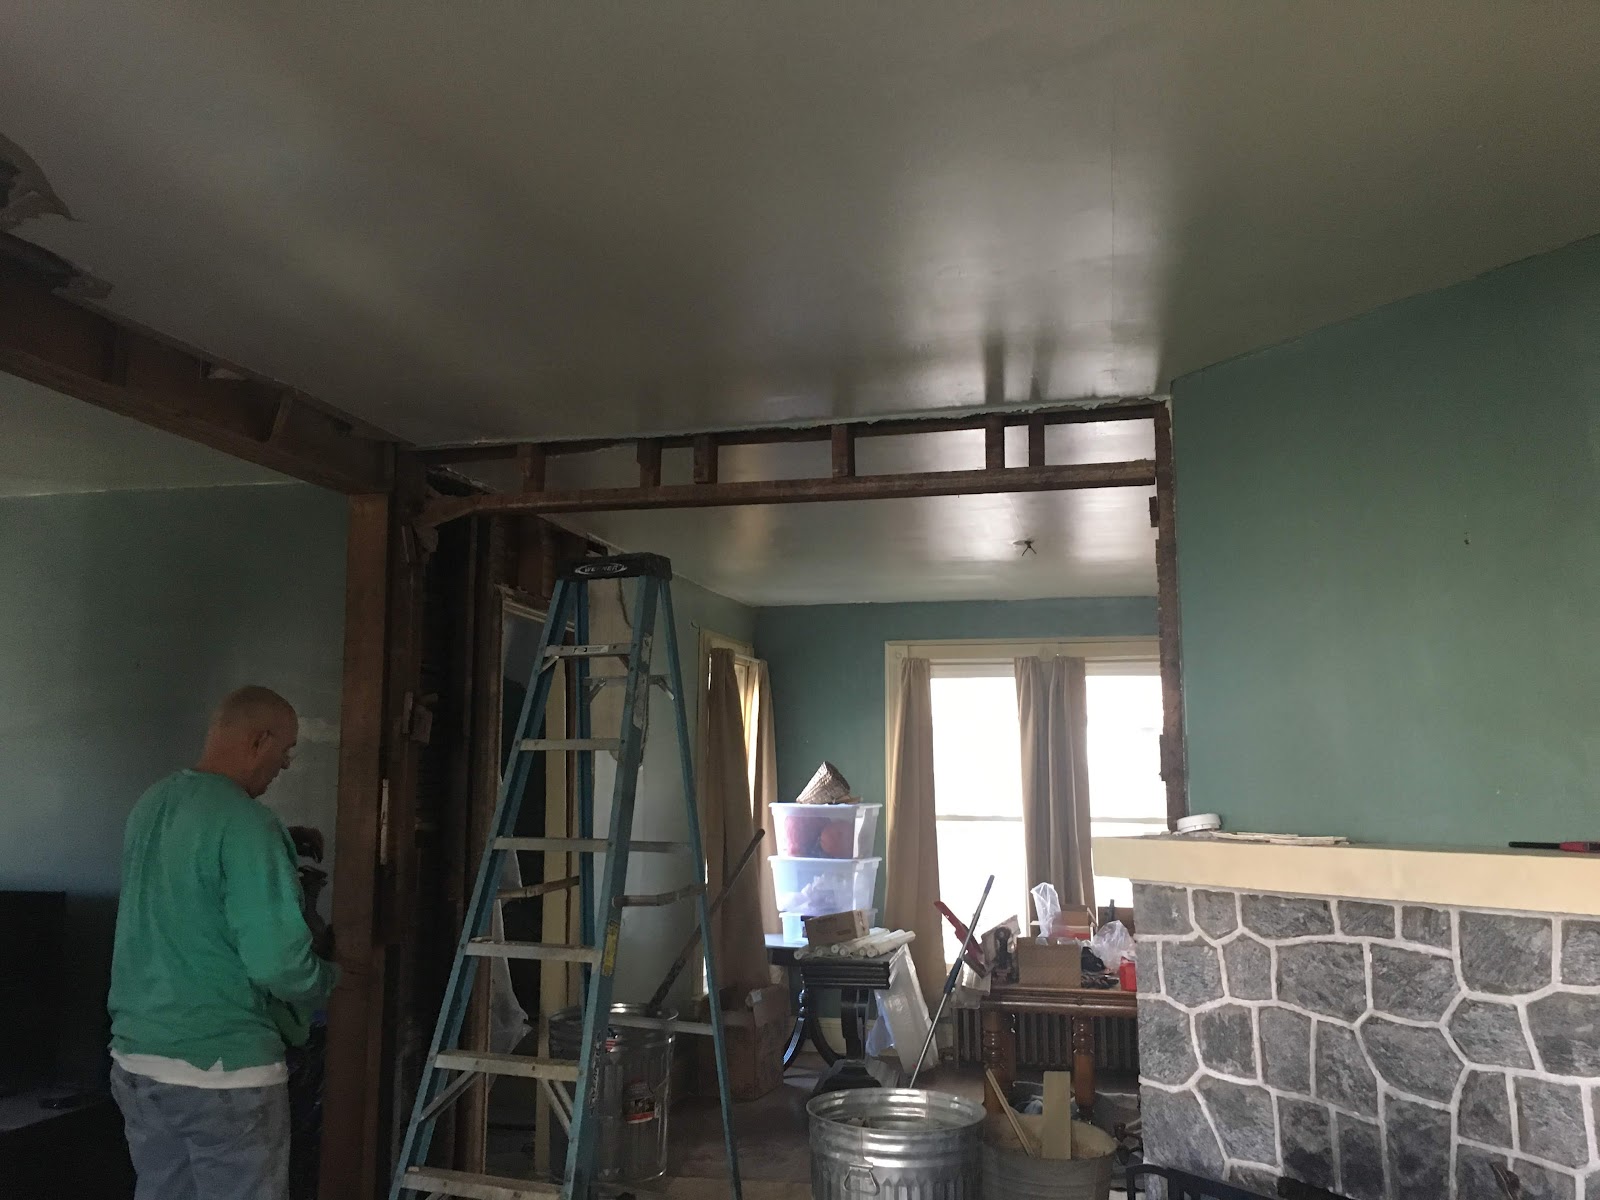
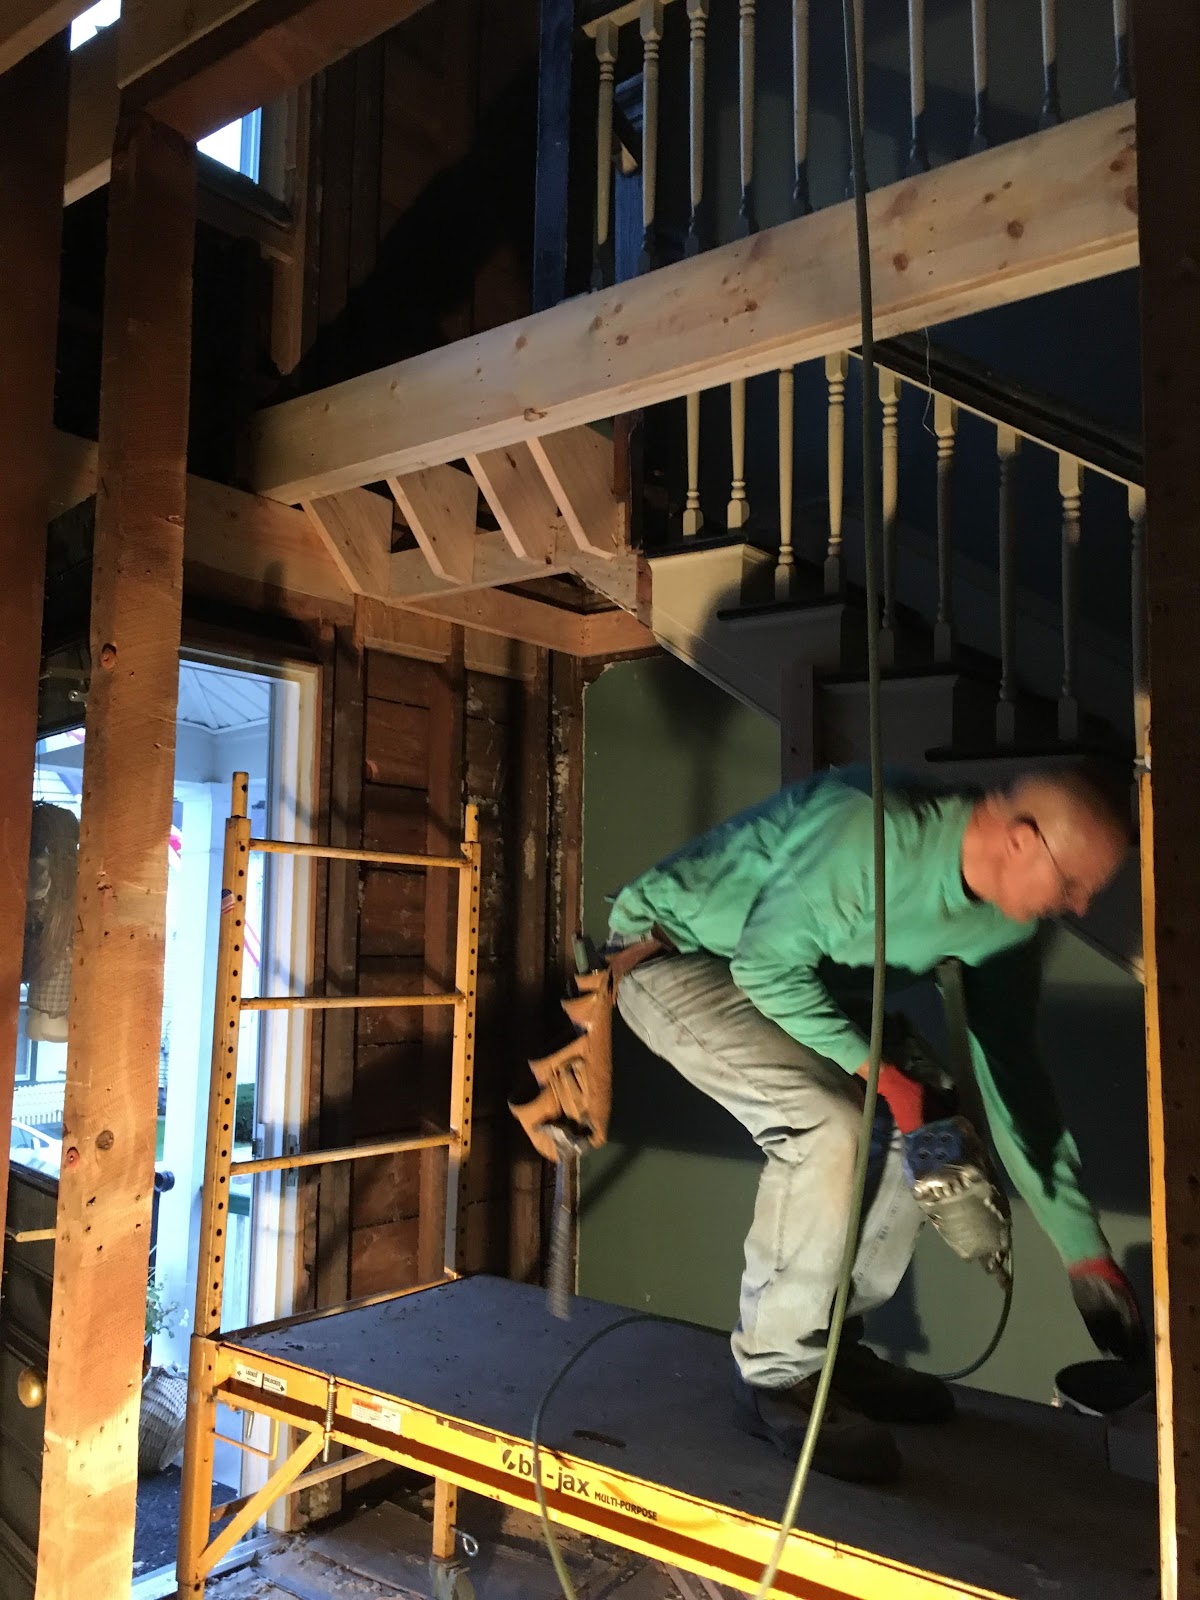
Framing continued downstairs as we removed the old beams between the rooms. We previously installed the LAM beams from above when we framed the upstairs. Our plan was to have an open concept with some definition between the rooms. We did have some unexpected demolition downstairs because the plaster ceilings became loose and we widened the doorways and added headers in the living room, hall, and butlers pantry. We also discovered a couple ceiling joist/upstairs floor joist that were split so we are taking advantage of the open ceiling to replace them.

Removing the old sagging beams that were NOT nailed in! (new LAM beam installed above)

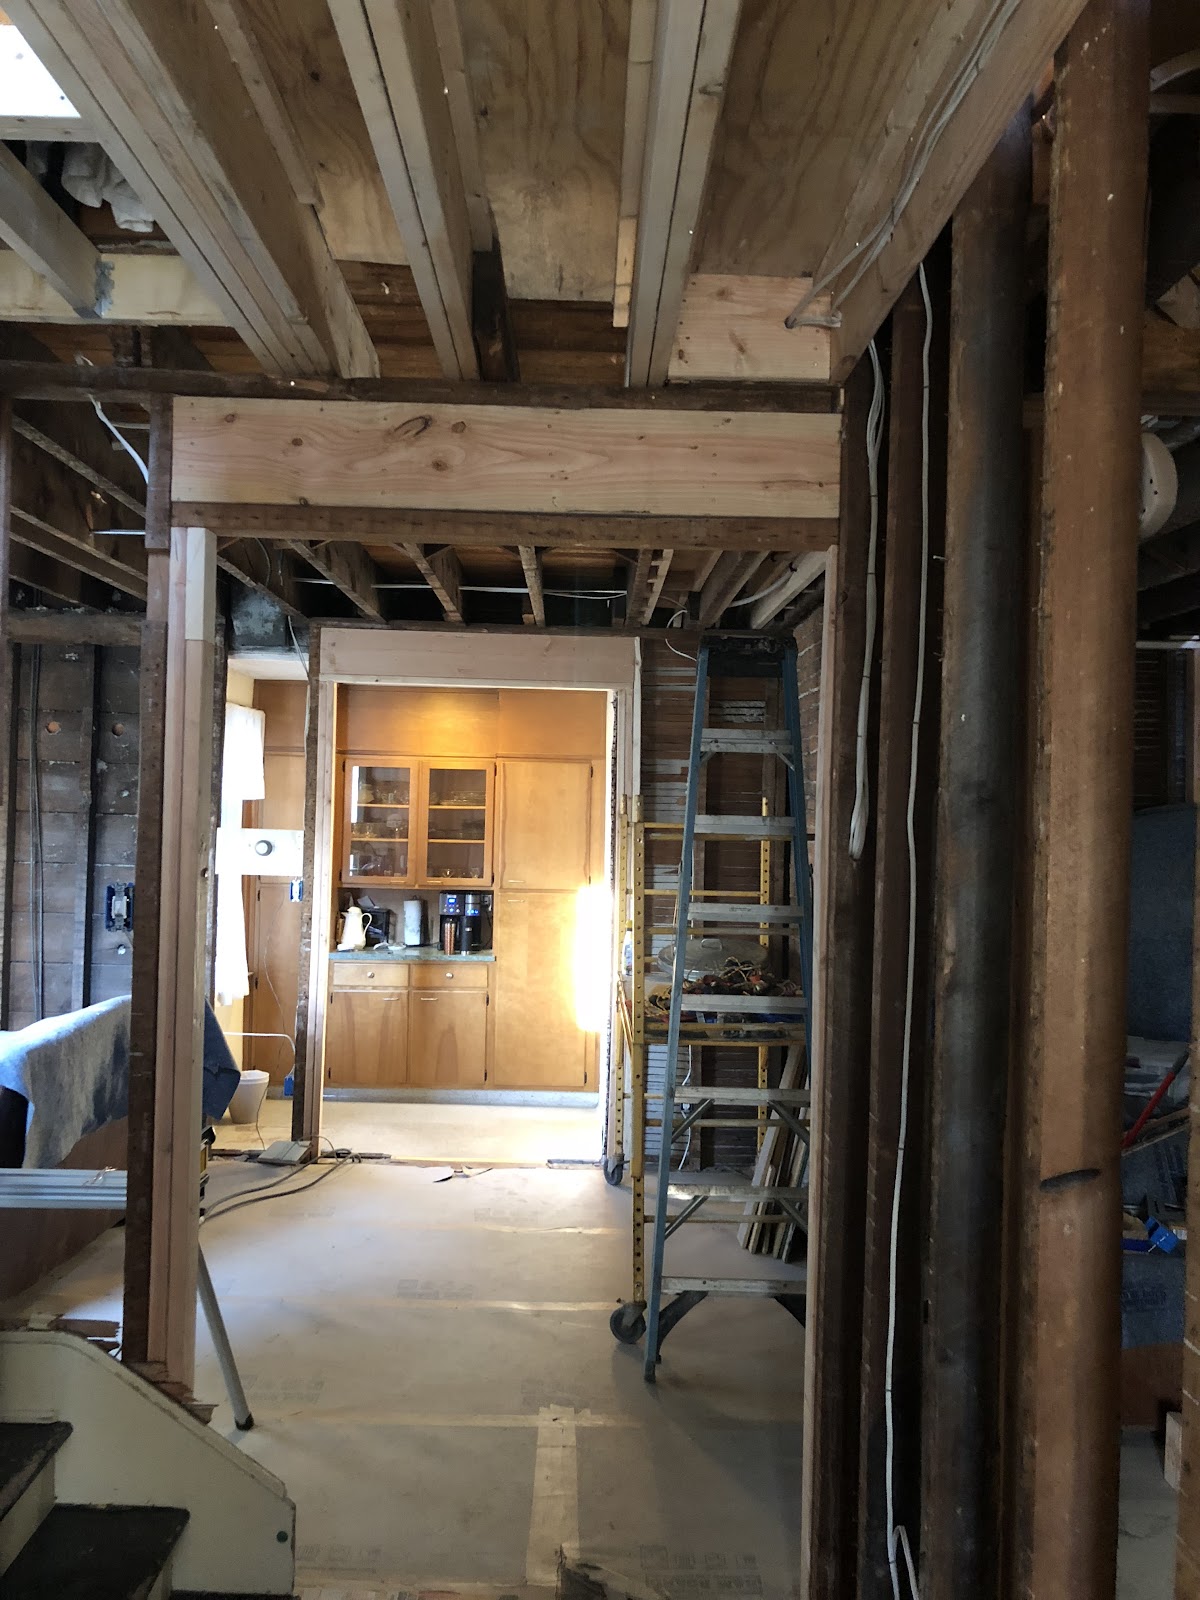
Doorway widened and headers installed; photo is from foyer looking through dinning room to butler's pantry.
It also uncovered some issues we needed to address with the fireplace. The firebox was shortened when the stone was added. So, we are restoring the firebox back to its original size and installing a period correct mantel.
It also uncovered some issues we needed to address with the fireplace. The firebox was shortened when the stone was added. So, we are restoring the firebox back to its original size and installing a period correct mantel.
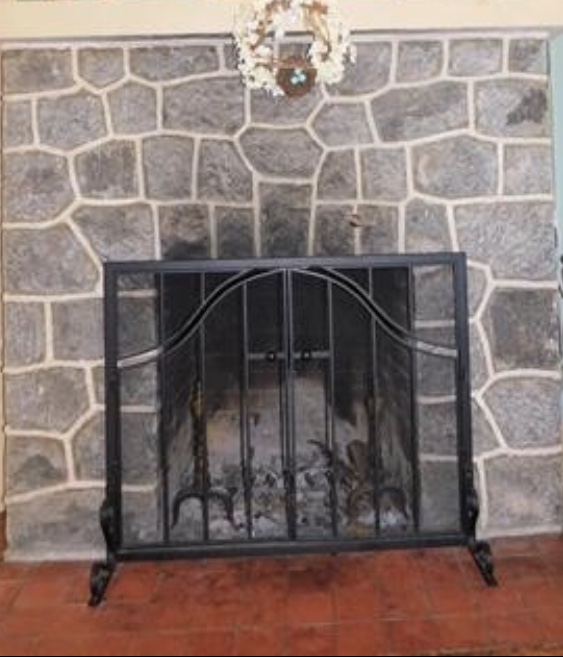
This was the stone on the fireplace that we removed.
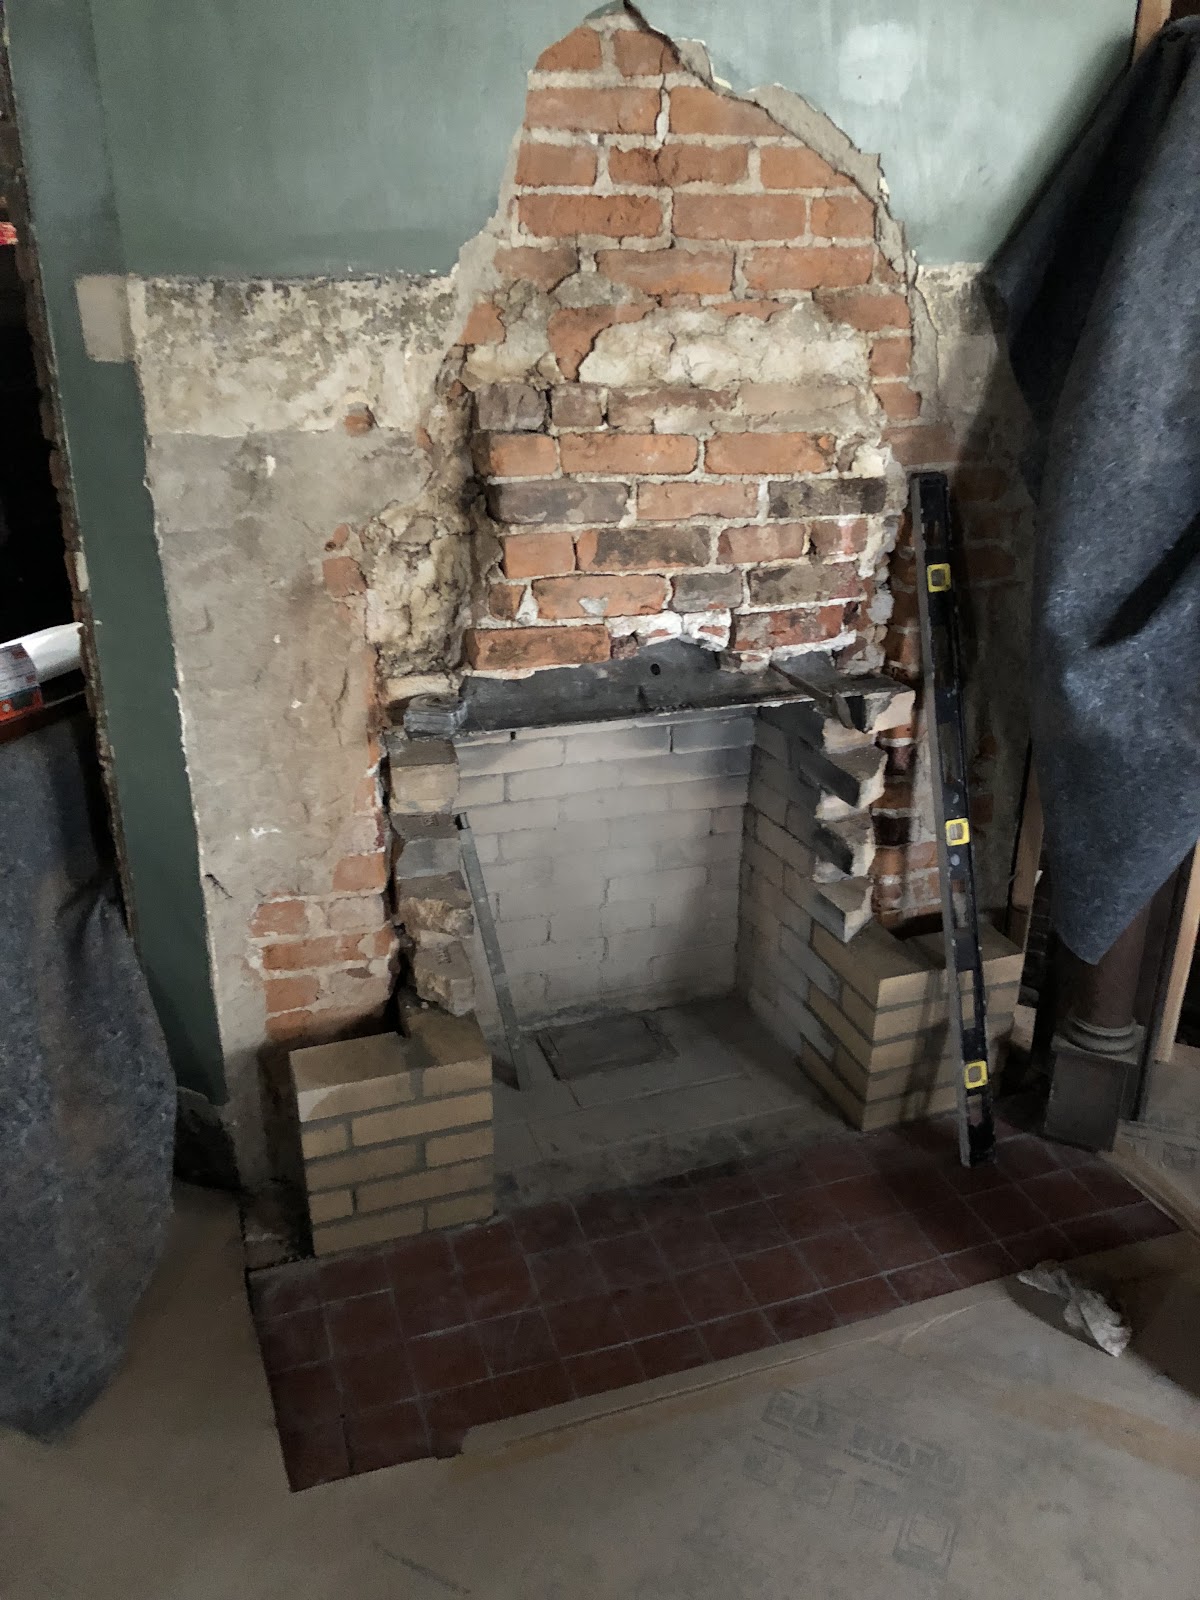
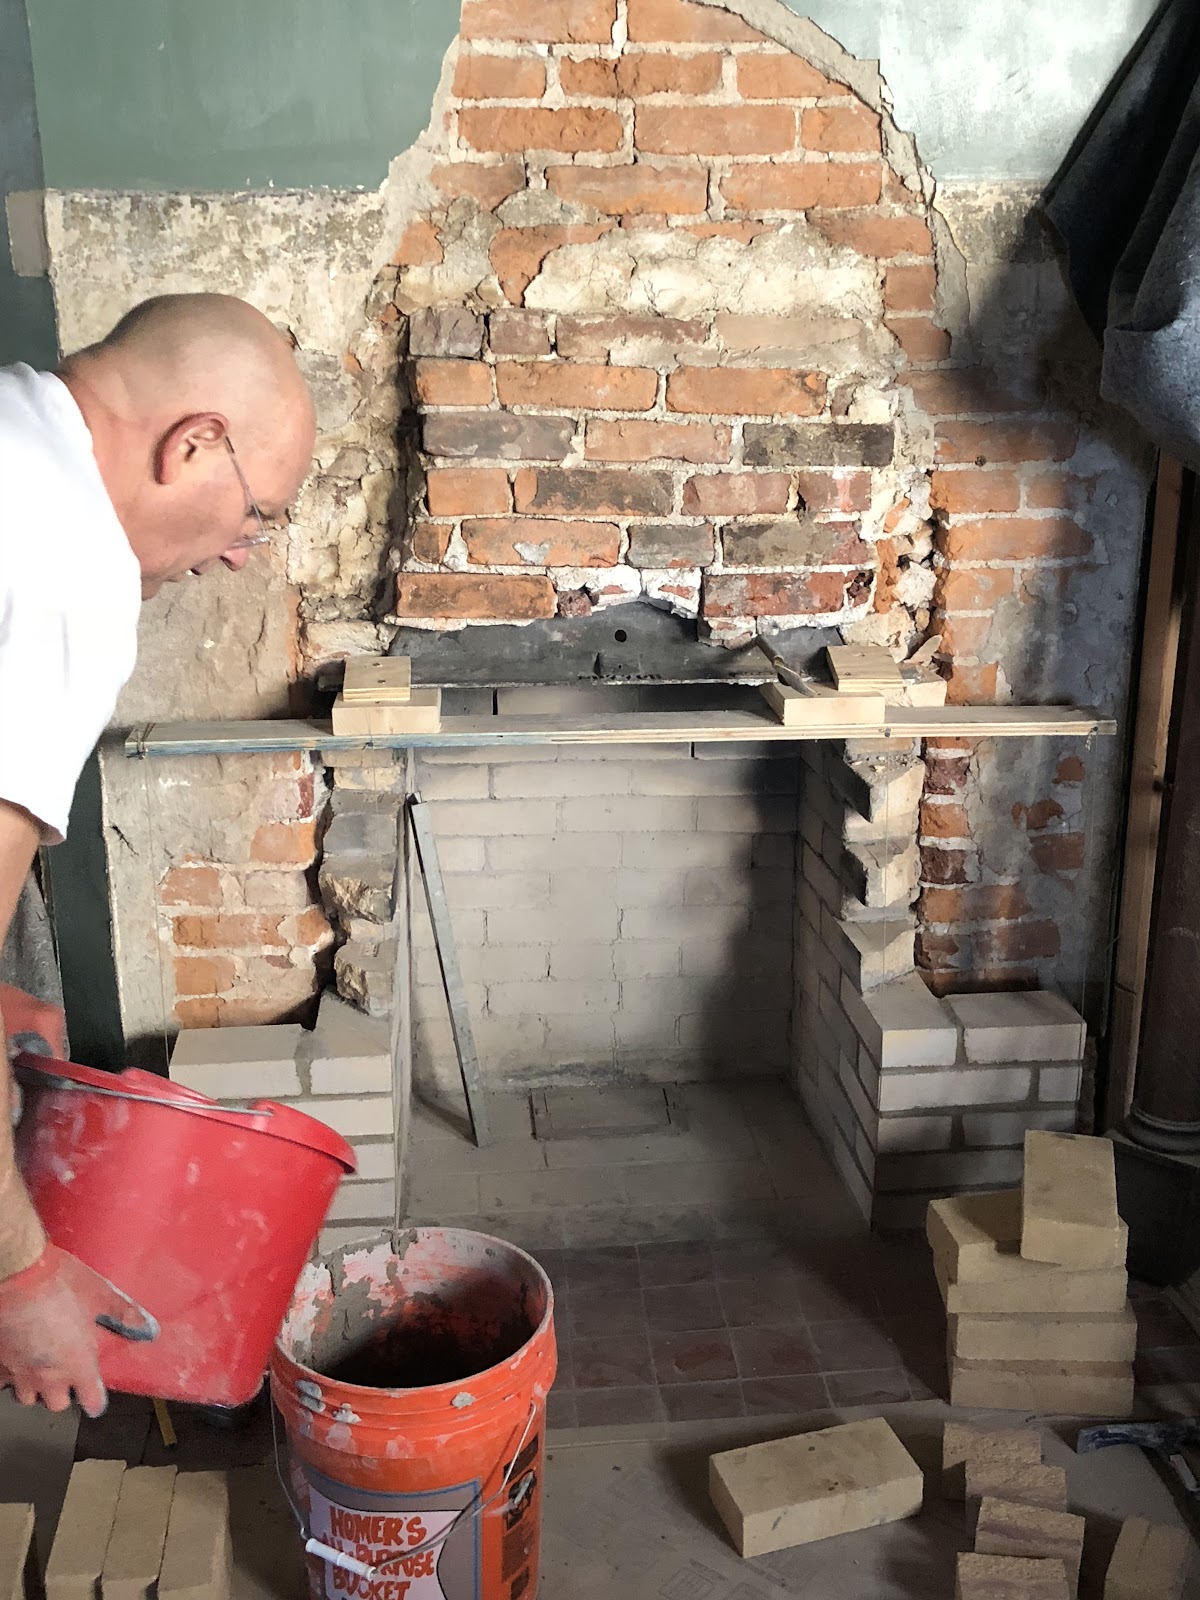
Building the firebox out to the correct position with 4”x 9” firebrick and refractory mortar (HeatStop 50)
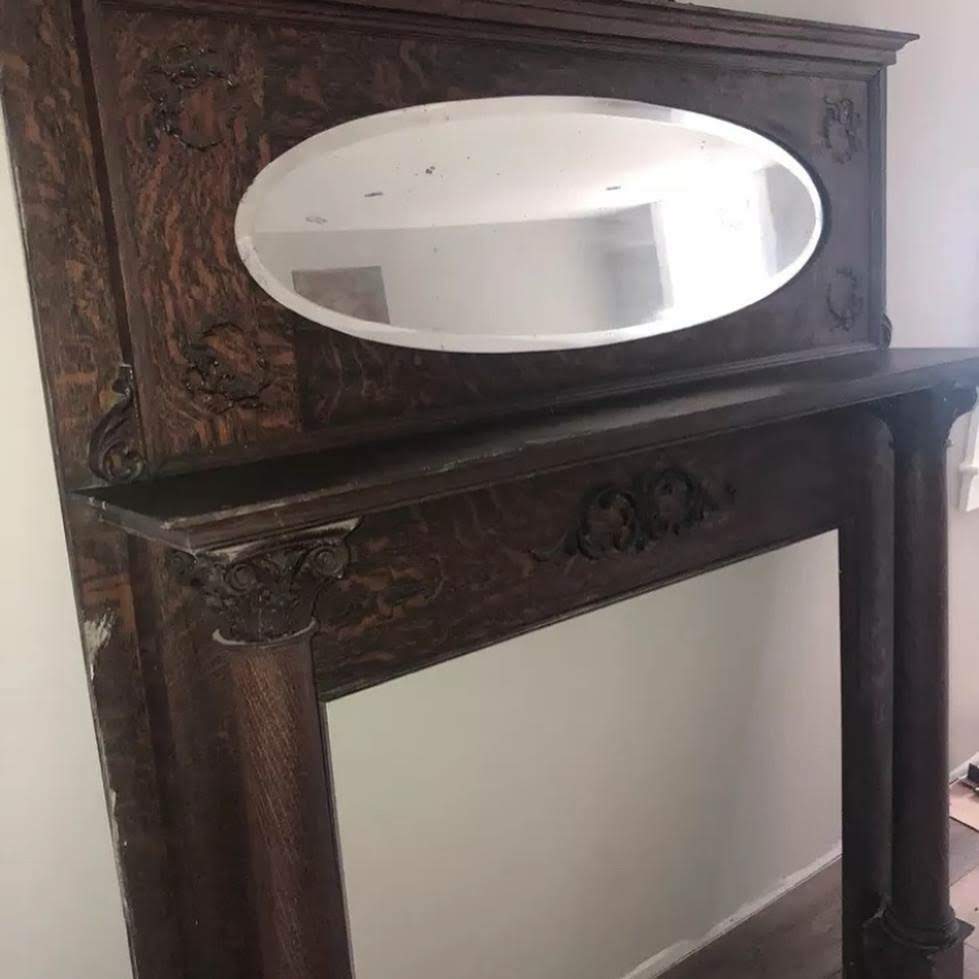
Our $53 eBay purchase! This will eventually be the fireplace surround.
Another framing challenge was the main stairs. Over the years it developed a lean and needed to be jacked, leveled and reframed.
Another framing challenge was the main stairs. Over the years it developed a lean and needed to be jacked, leveled and reframed.

Jacking the sagging steps.

Removing the broken beam.

Prepping for the new beam

Stairs leveled.

New beam and joist in place.

All the upstairs floors (2nd floor) were leveled using a rotating laser and sheathed with ¾” tongue and groove sheeting. The sheeting was placed between the joist in the hallway and bathrooms (where radiant heat will be installed) to compensate for the thickness of the radiant heat panels.
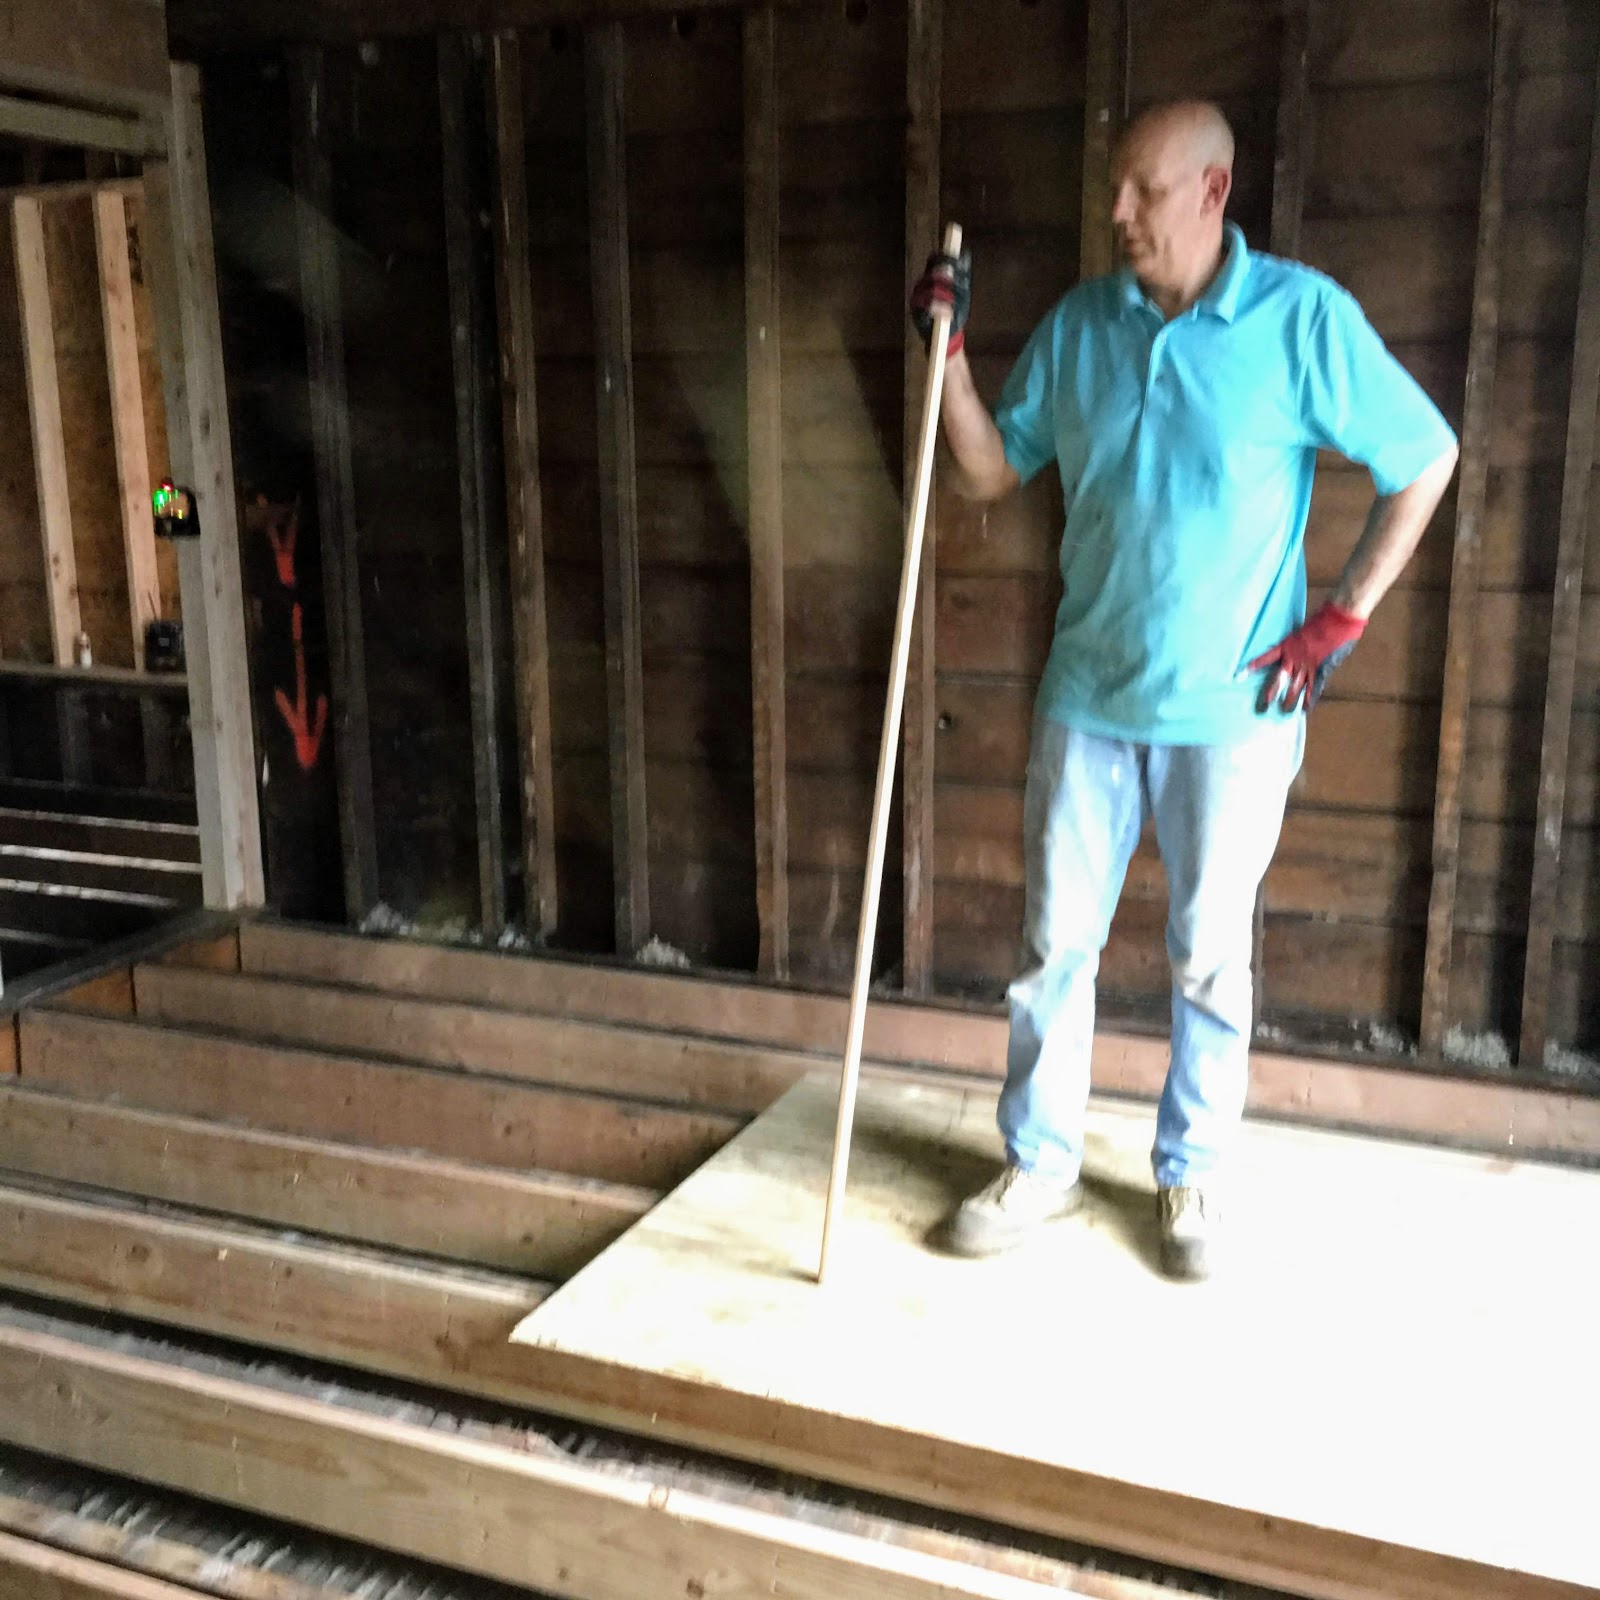
Leveling the floors
New sub floor installed
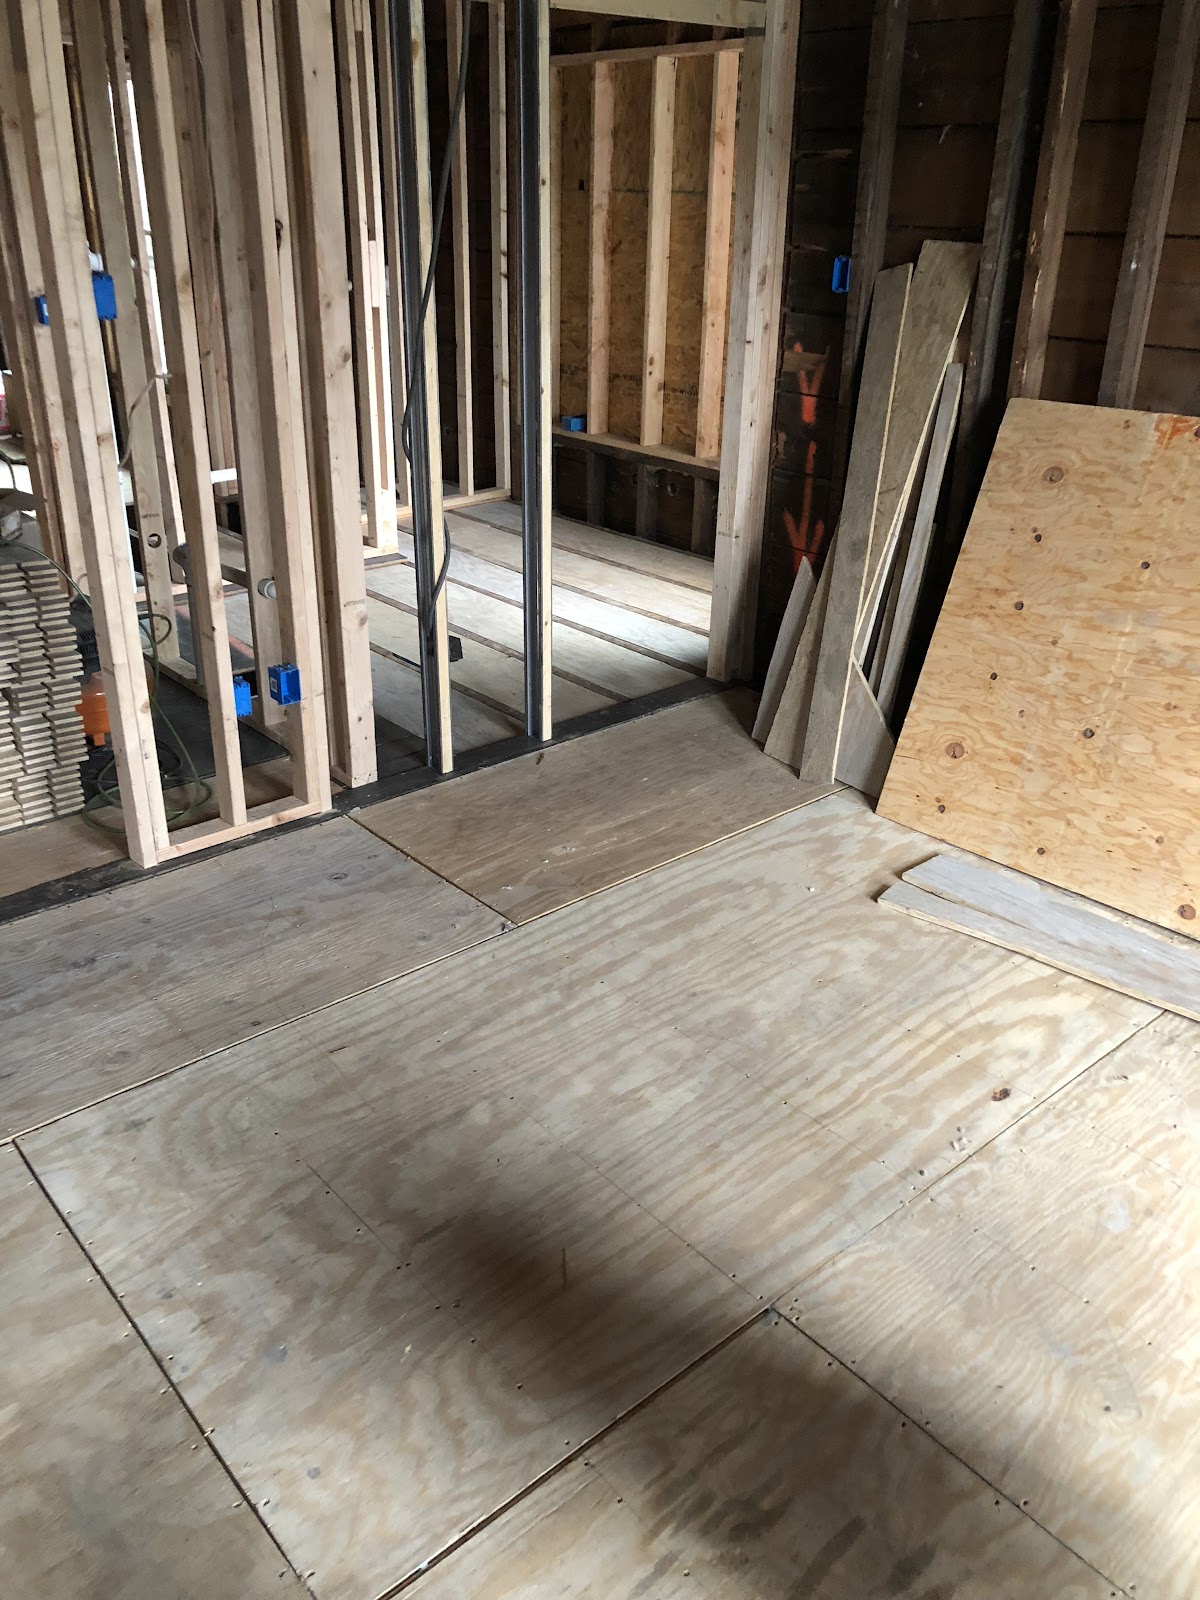
Sub floor glued and nailed.

Sub floor installed between joist to allow for the radiant heat panel thickness.

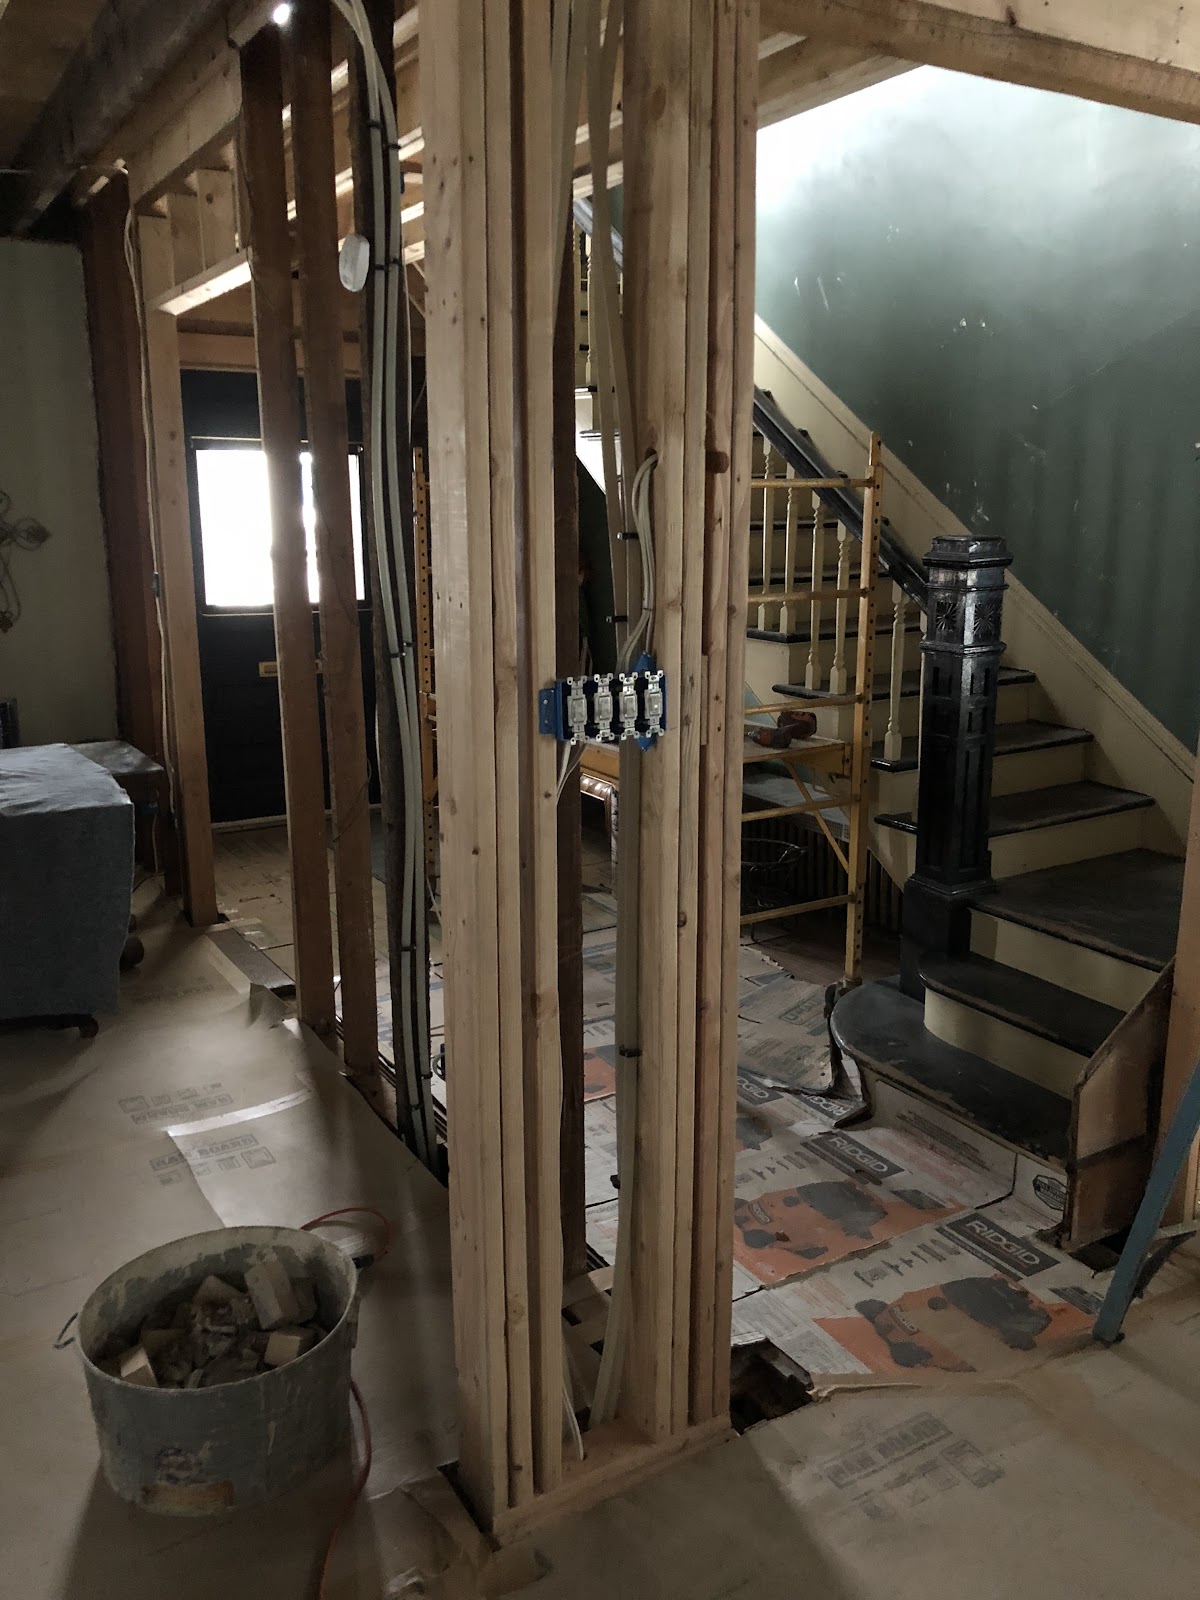
We also started to replace the electric. The majority of the house was knob and tube wiring and was not grounded. We had to add additional circuits, switches, and receptacles to bring it up to code. This included dedicated circuits for smoke and carbon monoxide detectors, refrigerators, central air, etc. We increased the amount of three and four way switches to provide more convenience locations. Almost ready for the electrician to install the new 200 amp service once we finish running all the home runs to the basement. We also had the gas company install a larger meter because we plan on installing a whole house generator in the spring.
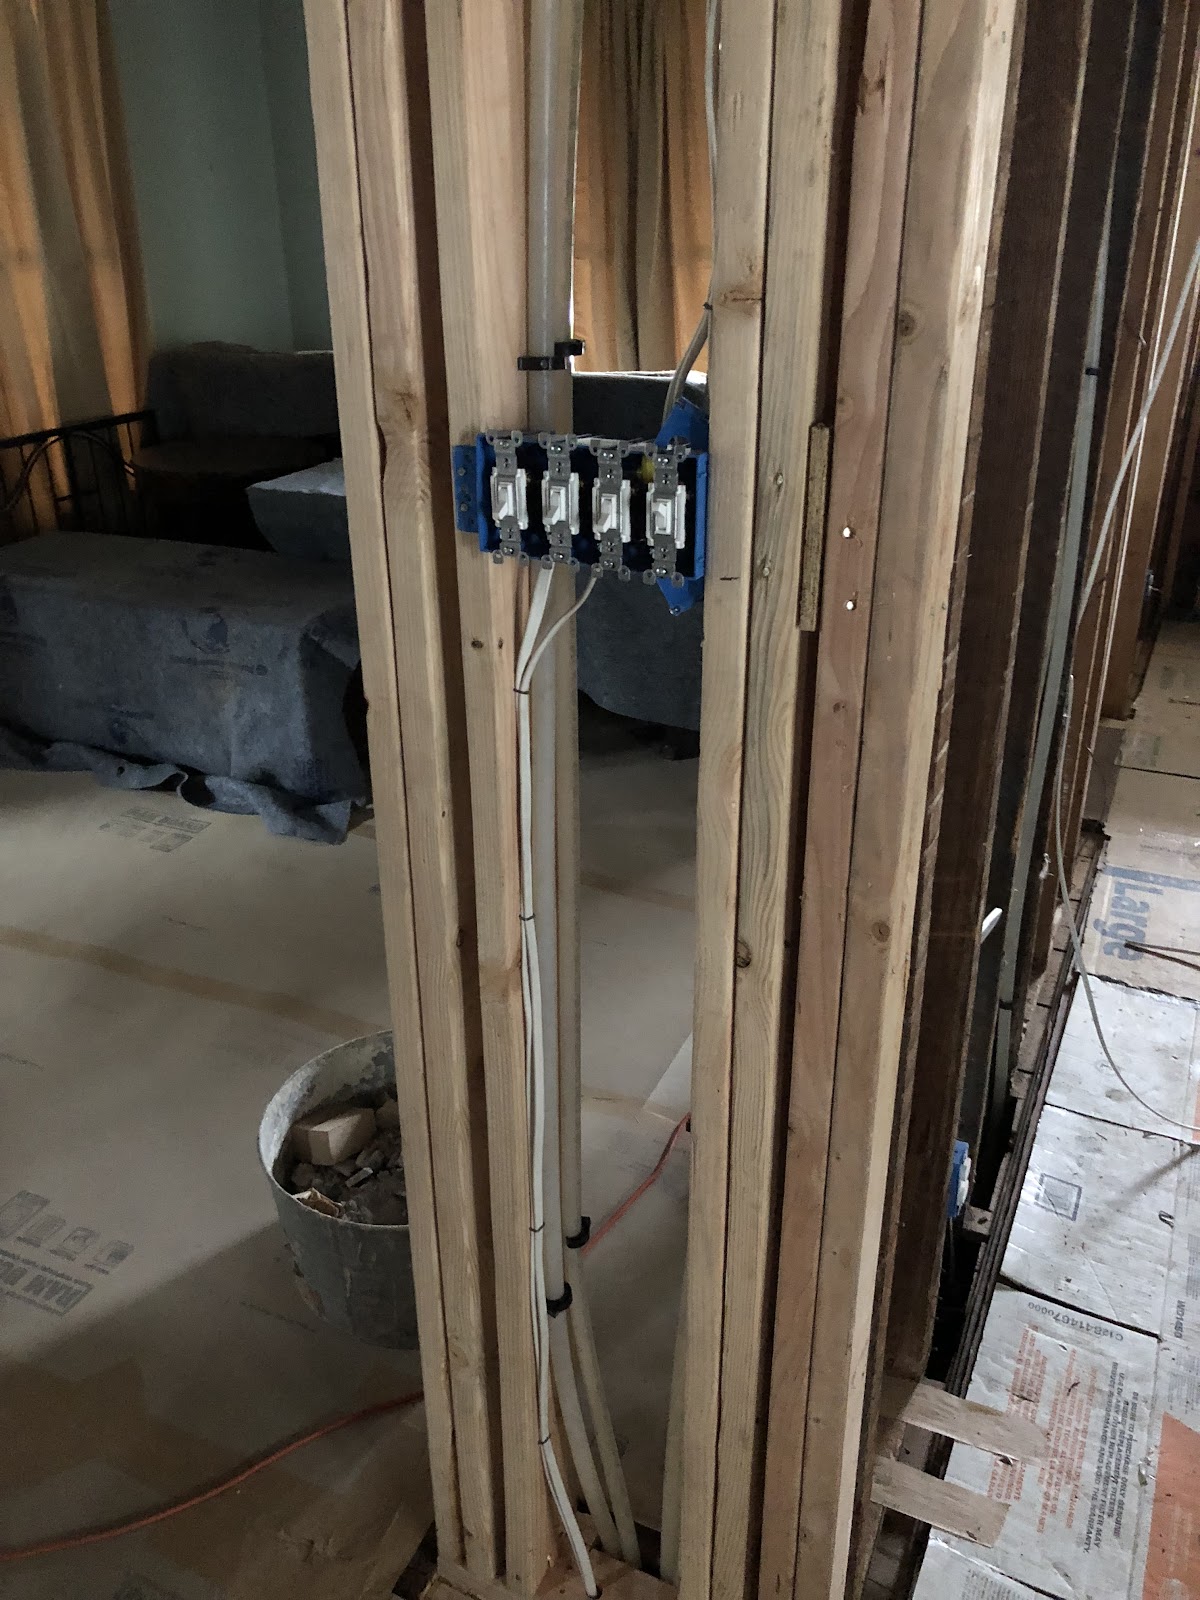
Multiple three and four way switches installed for convenience.

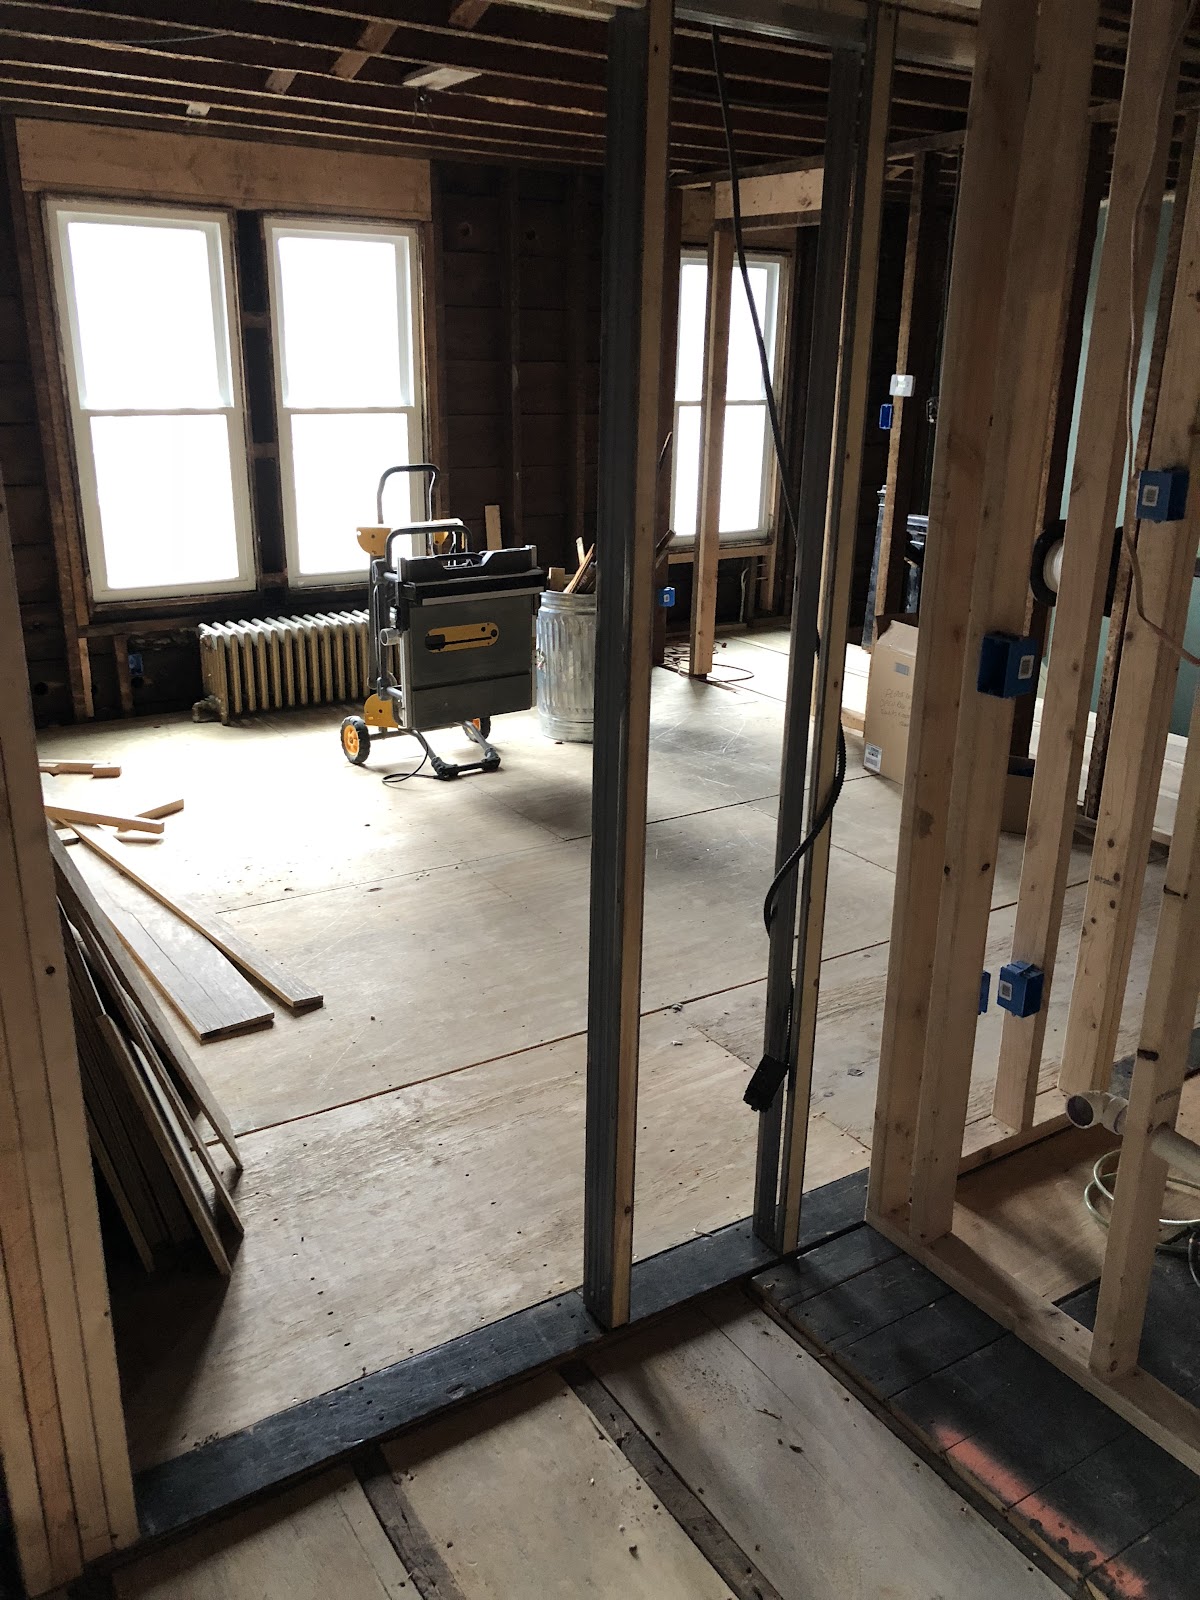
All the drain lines are plumbed for the new bathrooms, but we still have to rough in the water lines and put the vent pipes through the roof. All the plumbing will be brought to code as the old plumbing lacked vents and needed some minor issues addressed.
The cold water will be supplied off a 1” manifold through ½” feeds. This is done with Uponor expandable pex. We decided on expandable pex because it give us the full inner diameter of the pipe, whereas with regular pex, the fitting fits into the pipe reducing the flow. The hot water is plumbed in a loop so it’s instantaneous like in a hotel. Our goal is to be able to run multiple fixtures in the added bathrooms without any pressure or temperature deviations. So if you visit, you won't get scalded taking a shower upstairs if I flush the toilet downstairs!
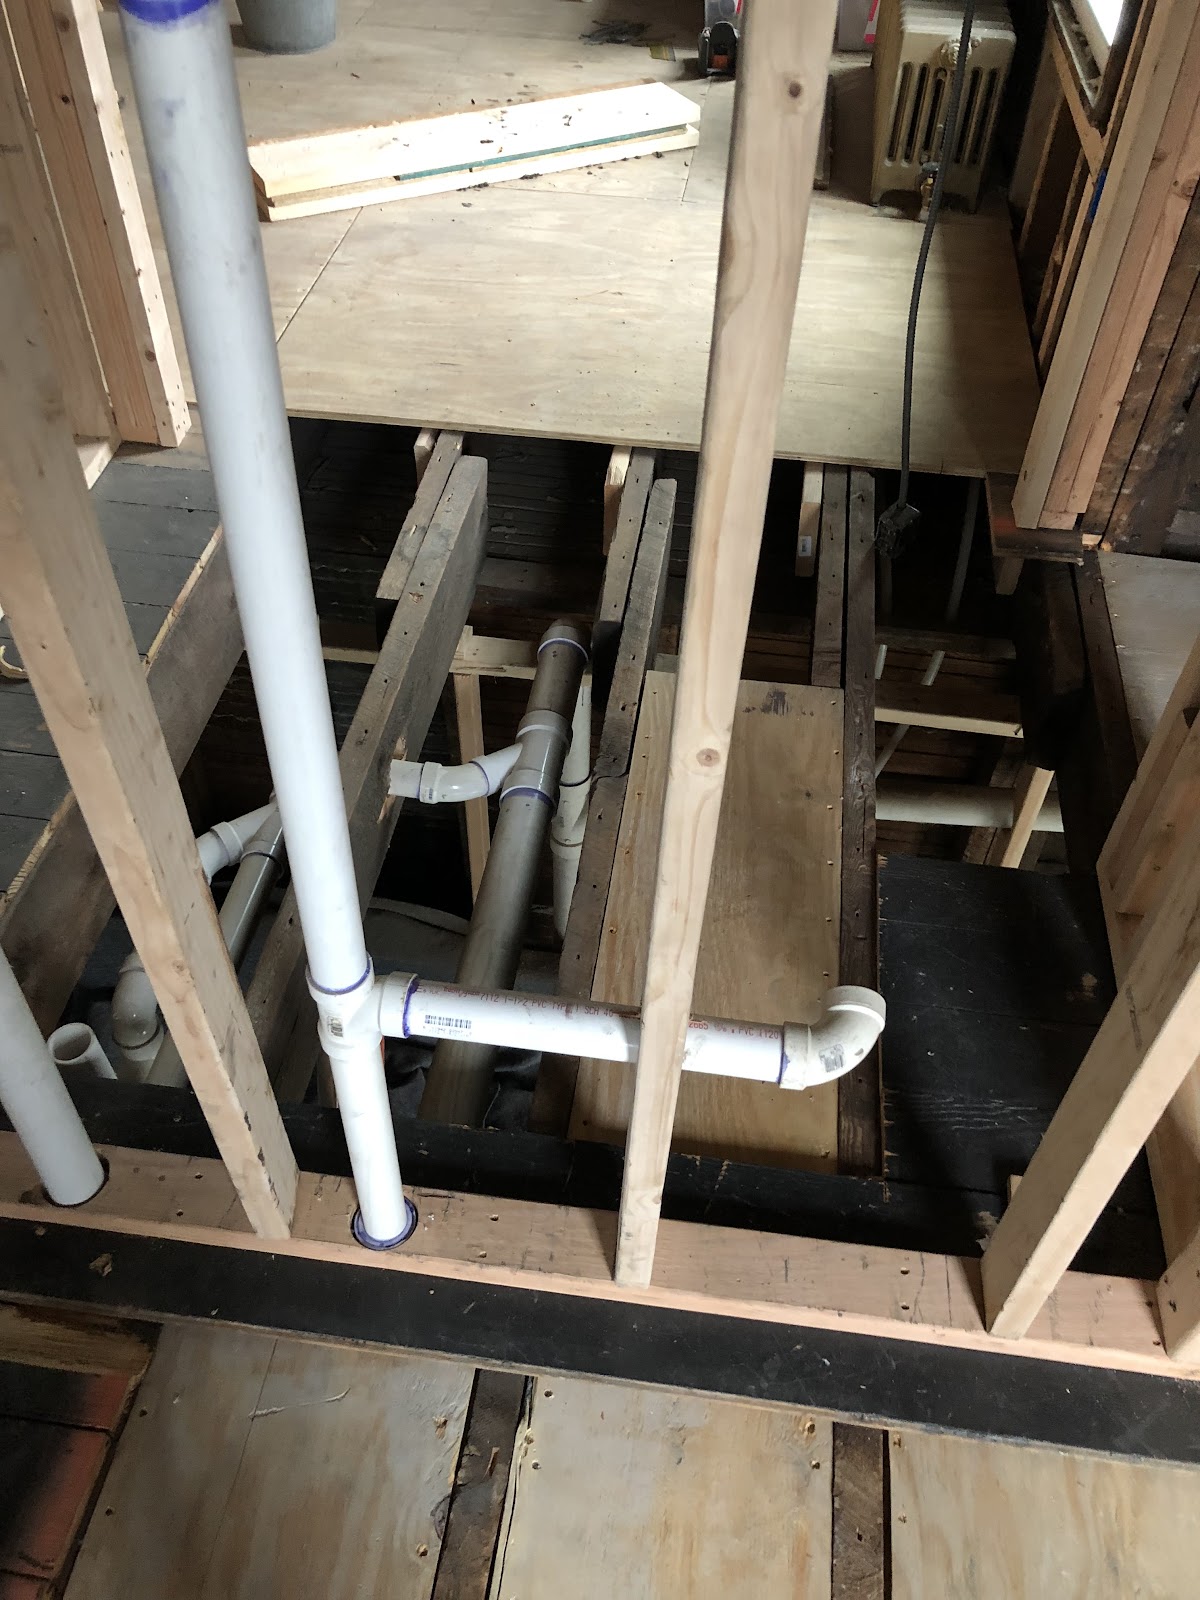


New PVC plumbing throughout the entire house.
Moving forward, our plan is to continue roughing in all the utilities, ducts for the central air, insulate, and get ready for drywall. December is a busy month for us with the holidays so we probably won’t get much done. Debbie and I made a commitment to each other before we started this project -not to allow the project to hold us down or disrupt our lifestyle. We will be spending some time with our grandkids (and our children) in Texas in December and I have two weeks of vacation in January with some plans to travel. Our long-term goal is to have the house complete for next year's Christmas party.
Moving forward, our plan is to continue roughing in all the utilities, ducts for the central air, insulate, and get ready for drywall. December is a busy month for us with the holidays so we probably won’t get much done. Debbie and I made a commitment to each other before we started this project -not to allow the project to hold us down or disrupt our lifestyle. We will be spending some time with our grandkids (and our children) in Texas in December and I have two weeks of vacation in January with some plans to travel. Our long-term goal is to have the house complete for next year's Christmas party.

Our grandkids!

Indiana Jude

Campbell Jane
Wishing everyone a Merry Christmas and a happy, healthy New Year!
Wishing everyone a Merry Christmas and a happy, healthy New Year!
Until our next update…….
Chris & Debbie
Holy cow! Chris you are a machine!!!
ReplyDelete